Posts

Showing posts from October, 2022

Using 3D Printer LCD module RGB MiniLCD12864V3 Part 4 Test App
Image
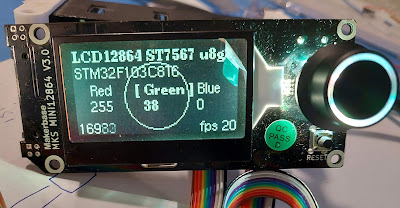
Using 3D Printer LCD module RGB MiniLCD12864V3 Part 4 Test App     Now we can use all parts in the module. 1 Part1 Intro introduction to the module pros and cons and ribbon cable pin definition. 2 RGB backlight   enabling the RGB backlight for the LCD screen 3 Part2 using LCD with SPI and U8G2   LCD wire connection, SPI setting, and using U8G2 lib to draw on the LCD. 4 Part3 Using the rotary encoder    also use beeper and buttons.   Now we can make "full" use of this lcd module, except for the SD card, I guess this can wait, since not many DIY project really need a SD card... With all these feature enabled, we now can make a test app. Test App to do list: Press any button, buzzer beeps. To use rotary encoder to change the LCD RGB backlight, and apply to the LCD backlight. Make a simple GUI on the LCD screen, make it work with the rotary encoder. Video https://youtu.be/t1N9a9b_4fA   Source code https://github.com/ntchris/stm8_stm32/tree/master/bluepill_makerbase_miniLCD12864_

Using 3D Printer LCD module RGB MiniLCD12864V3 Part 3 Rotary Encoder and Stm32

Image
Using 3D Printer LCD module RGB MiniLCD12864V3 Part 3 Rotary Encoder and Stm32   Very Easy There is a Rotary encoder in this LCD module, which is very useful in many very projects. It's quite easy to work with rotary encoder in Arduino hardware and Arduino IDE environment. But guess what, it's even much easier to work with rotary encoder in STM32CubeIDE for STM32 MCUs. Many Arduino implementation need to keep reading the GPIO value to act fast reaction for acceptable user experience, ...or,  it need to make use of Port Change interrupt due to lack of external interrupt in Arduino hardware. None of this is necessary in STM32 and STM32CUBEIDE. Also, there is no rotary left and right debounce capacitor on the module, it's nice to have them, but still, without them, it works perfectly, since STM32 has built in software debounce mechanism. More info about STM32 Timer link  Ribbon Cable Pin Connection EXP1 Pin9 ENC_BTN  the press button EXP2 Pin8 and Pin6 BTN_ENC1 and BTN_ENC2 O

Using 3D Printer LCD module RGB MiniLCD12864V3 Part 2 LCD u8g2

Image
 Using 3D Printer LCD module RGB MiniLCD12864V3 Part 2 LCD U8G2   Pins Required by LCD In part1 we have an introduction for this miniLCD12864V3 module. Part1 :  https://superdiyprojects.blogspot.com/2022/10/using-3d-printer-lcd-module-rgb.html  Using 3D Printer LCD module RGB MiniLCD12864V3 Part 1 Intro The major part of this module obviously is the LCD, it's 2.2inch size and has RGB backlight. 2.2inch is quite a good size, not too large and not too small. To drive it, we need to connect below pins to MCU: EXP1 Pin8 LCD_EN optional, keep in GND, this works as well Pin7 LCD_RS (DC data/command) must connect to MCU Pin6 LCD D4 Reset, optional, better to connect to MCU when in development phase, so it's easier to reset the LCD. PIN5 LCD_D5 RGB data, mandatory, without RGB backlight working, we cannot see anything on LCD screen. Pin2 GND Pin1 5V EXP2  Pin9 SPI_SCK SPI SCK, must connect to MCU Pin5 SPI MOSI, must connect to MCU The rest Pins are not needed for driving LCD. MCU

Using 3D Printer LCD module RGB MiniLCD12864V3 Part 1 Intro

Image
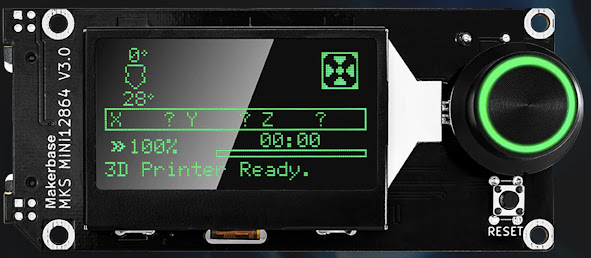
Using 3D Printer LCD module RGB MiniLCD12864V3  Part 1 - Intro   MiniLCD12864V3, a common 3DPrinter DIY module There are quite a few low cost LCD modules in the market, the price is only about 12$ each, it contains a 2.2inch size mono LCD, resolution is 128X64, which has beautiful RGB backlight, and a rotary decoder (rotate left, right, button press), and another button, and a buzzer, also on the back there is a SD card slot.  They are quite popular in the DIY 3D printer community, they use two 10pins ribbon cables /connectors to connect to some 3D printer main controller boards. They are supported by Marlin2.0 firmware.   Lcd module running 3Dprinter Marlin firmware. LCD backlight and rotatry encoder has RGB capability ( green in the picture) Back of the module. There is a buzzer, two EXP1-2 10 pins connectors, 3 RGB IC, a level shifter IC, a 5V to 3.3V regulator, and a SD card slot. These are very common components for many many DIY projects, especially the buzzer, LCD and rotary enc