ERCF Hardware and Software Config and Setting Notes for Mellow ERCF CAN BUS board
ERCF Hardware and Software Config and Setting Notes for Mellow ERCF CAN BUS board
ERCF = Enraged Rabbit Carrot Feeder Voron Printers like 2.4. Fysetc and Mellow is/are 3D printer parts/electronics vendor(s)
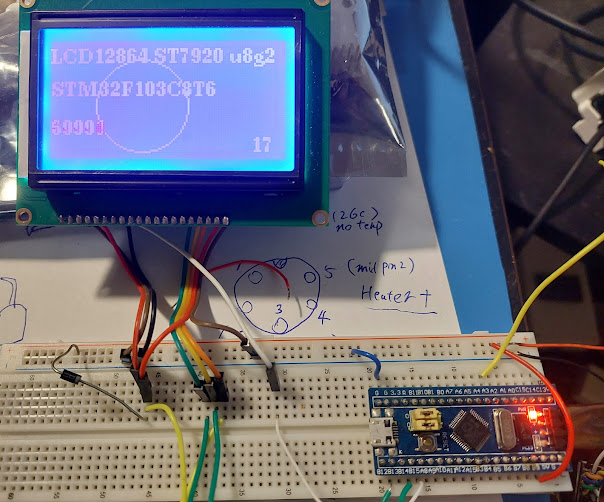
This is the Mellow ERCF canbus board

There are so many combination in the configuration when using ERCF, see below..., so I think a HW/SW config note is necessary.
A few key points in the config:
- Using SensorLess Selector Homing
- Mellow ERCF Board supporting Canbus
- Using CANBUS (not USB) to Klipper mother board
- My Klipper mother board is Optopus but it shouldn't matter
- Using HappyHare ERCF Software V3 (https://github.com/moggieuk/ERCF-Software-V3). ( original ERCF fw has quite different config file)
- Tool head has no hallsensor or mechanical microswitch sensor, since not needed ( but PTFE Pneumatic fitting to lock the PTFE (2.5 ID mm/4mm OD) is needed since ptfe tube must be locked tight to the tool head.
Mellow ERCF Canbus Board preparation
Hardware Jumper config
1 Do NOT plug in the CanBus 120 Resistor Jumper, because, Klipper board has it, Tool Head has it, so ERCF doesn't need it. base on the fact that we are trying to use CANBus for ERCF, so I am guessing most likely a CanBus toolhead is already running in the system! There are total TWO 120 ohm resistors should be in the CAN bus, at the beginning and the end of the CANBus. (It's hard to tell if the Canbus toolhead board or Canbus ERCF is the end, so it shouldn't matter, both are equally far far away from the Klipper mother board)
2 Selector Driver stick is on the left. use only one Jumper for Uart under driver stick slot, 3rd row, jumper on right. uart jumper

no other jumper is needed, diag doesn't need jumper. BTW The Jumper picture in Mellow ERCF's webpage is wrong, probably someone just copy paste from their klipper mother board. https://mellow.klipper.cn/?spm=a2g0o.detail.1000023.3.13e16cccOvvDGr#/board/fly_ercf/pins
3 mellow TMC2209 driver stick setting for DIAG PIN. diag micro switch must move to ON position ( ON position, not 1, low )

4 Always double check all plug/connector's wires definition/polarity. I am moving from Fysetc's ERCF (usb interface) bundle, with ERCF PCB and all the servo and encoder, wires and everything to this Mellow CANBUS board, so quite a few wires need to modify.
- mechanical micro switch endstop connector mod. Fysetc connector/wire order may directly short the 3.3V and GND on Mellow ERCF and cause a disaster, we can simply move one wire to the other side on the XH254 plug, use only GPIO20 (left) and GND(middle), and leave 3.3V (right)not used. mechanical micro switch doesn't care about which is GND which is GPIO, but a good practise is use Black for GND. Do not plug in the connector without modding it first, instant short, (it's a normally close switch)
- optical encoder. Need reorder wires for 3.3V, GND, and GPIO to the correct order, can do this on the XH254 or Dupon side. a good practise is to use red for 5V/3.3V, black for GND, other color for signal/GPIO. so we won't accidentally fry any devices.
- Check servo wire/connector, they are in wrong order, I just removed the XH254 socket on the mellow ERCF board and put it back in but rotated 180Deg. Seems easy.
- no need to change stepper motor wiring(if not working correctly, simpily change DIR pin in config file)
Always refer to Mellow's official pin definition. https://mellow.klipper.cn/?spm=a2g0o.detail.1000023.3.13e16cccOvvDGr#/board/fly_ercf/pins
or this pin picture (Note, they may have new version hardware in future
and this Pin picture could expire, use at your own risks)


Flashing CANBOOT for ERCF board
the Mellow ERCF board may already have CANBOOT flashed in factory, howerver, the speed may or may not be the same as our existing Klipper mother board (ie Octopus/ToolHead Canbus board etc). My existing system is running 1000,000 (six zero), so the new mellow ercf board doesn't work with it ( so maybe it's running 500000 (5 zero) speed ) So USB is the only option to flash Canboot.
ssh login Pi4.
git clone https://github.com/Arksine/CanBoot
cd CanBoot
make menuconfig
Use below setting and save then make
RP2040
16K bootloader
4RX/ 5TX
1000000 ( or 500000, must be the same as Klipper mother board)
Enable Status LED
GPIO17 for mellow LED
 (not to be confused by ERCF klipper firmware, this is for CANBOOT only)
run make to make the uf2 file in the out dir
make
get the ufs file in dir out/canboot.uf2
power off ERCF (the whole printer), connect USB cable to Pi4, hold boot botton in ERCF board, power on ERCF. (the whole printer, including 24V)
lsusb
lsusb command should find the rp2040 id ( mostlikely 2e8a:0003), if not, must redo the hold botton / power on again. run this to flash CANBOOT to the ERCF board
make flash FLASH_DEVICE=2e8a:0003
Flashing Klipper for Mellow ERCF
ssh login Pi4
cd ~/klipper
make menuconfig
choose every option mostly the same as previous canboot,
RP2040
16K bootloader
4RX/ 5TX
1000000 ( or 500000, must be the same as Klipper mother board)
Enable Status LED
GPIO17 for mellow LED

make and flash it using the CAN ID of the ERCF
make -j4
python3 ~/klipper/lib/canboot/flash_can.py -u efc740efc589 <==(the CAN id)
printer config file for mellow ERCF Canbus using SensorLess Selector Homing
refer to this config file https://github.com/ntchris/voron_mod_super_diy/blob/main/for_enraged_rabbit/mellow_ERCF_CanBus/ercf_hardware_mellow_canbus.cfg
basic facts about Mellow ERCF board. selector endstop pin is GPIO20 Left driver stick is driver0 in schematics, is for Selector, TMC driver diag pin is gpio22
a few key points in the config file (again, for sensorless selector homing)
config file name ercf_hardware_mellow_canbus.cfg, include this file in the main printer.cfg file. set the CAN id
[mcu ercf]
canbus_uuid:  efc74####c589 (your mileage may vary, your CAN ID is very different)
for physical selector endstop pin (even though we are using sensorless homing, physical selector is still needed, because Happy Hare can use that to detect a true home position VS blocked by filament.
[manual_extruder_stepper gear_stepper]
endstop_pin: ercf:gpio20
[tmc2209 manual_stepper selector_stepper]
diag_pin: ercf:gpio22	# Set to MCU pin connected to TMC DIAG pin, pullup is not needed

# no need to make selector stepper motor current as low as possible, since select motor rarely move
# if current is too low,
run_current: 0.55
driver_SGTHRS: 70		# 255 is most sensitive value, 0 is least sensitive, adjust according to your setup
[manual_stepper selector_stepper]
endstop_pin: tmc2209_selector_stepper:virtual_endstop
When everything is correct, Go to mainsail -> machine -> Endstop query when selector not touching endstop below two should be OPEN: Endstop MANUAL_EXTRUDER_STEPPER GEAR_STEPPER OPEN Endstop MANUAL_STEPPER SELECTOR_STEPPER OPEN
When selector pushing endstop, gear stepper should be triggered (that's right, HappyHare use the endstop inside gear stepper, not selector stepper): Endstop MANUAL_EXTRUDER_STEPPER GEAR_STEPPER Triggered Endstop MANUAL_STEPPER SELECTOR_STEPPER OPEN
[ercf_servo ercf_servo]
pin: ercf:gpio21   # mellow ercf
## ENCODER -----------------------------------------------------------------------------------------------------------------
[ercf_encoder ercf_encoder]
encoder_pin: ^ercf:gpio15	  # mellow ercf
ercf_paramenters.cfg
sensorless_selector: 1 # 0 = use only a physical endstop, 1 = use advanced sensorless selector homing
Using HappyHare, should always sync to extruder, so to let ERCF help to pull the filament out from buffer, otherwise the printer's toolhead extruder may not have enough power to pull and the print will have big problem.
sync_to_extruder: 1 # Gear motor is synchronized to extruder during print
To help to let ERCF always enabled after printer restart, can use this version of ERCF ercf.py, https://github.com/ntchris/ERCF-Software-V3/blob/master/extras/ercf.py
Testing sensorless selector home
Use ERCF_home and ERCF__SELECT_TOOL TOOL=5 to test selector. If selector cannot move and have red error inside mainsail
An issue with the ERCF has been detected...Selector recovery failed. Path is probably internally blocked and unable to move filament to clear
must set the current higher (ie 0.55, 0.6 ) and driver_SGTHRS lower (ie 60, 70, 80) If current is too low and driver is too sensitive, it cannot move because the resistance/friction is too high.
Trouble shooting
Mainsail cannot boot, firmware restart / restart error in webpage.
Probably the CAN wire is not properly connected in ERCF board. Consider replug in /plug in hard the 24V/CAN connector in the mellow ERCF board.
when move, selector goes to wrong direction - left / right
depends on the stepper motor wiring, the direction could be reverted. can be fixed by reverting the dir pin by adding or removing !
dir_pin: !ercf:gpio1
dir_pin: ercf:gpio1
when gear motor rotate, it goes in wrong direction.
refer above
selector cannot move and have red error inside mainsail
An issue with the ERCF has been detected...Selector recovery failed. Path is probably internally blocked and unable to move filament to clear
Solution: Must set the current higher (ie 0.55, 0.6 ) and driver_SGTHRS lower (ie 60, 70, 80) If current is too low and driver is too sensitive, it cannot move because the resistance/friction is too high.
stepper motor (selector or gear ) does nothing but very hot.
Check the stepper motor enable pin in ercf hardware config file, may need to remove the ! (revert sign) With the wrong revert sign, when doing nothing, the motor is enabled/coil(s) is(are) powered on. so it gets hot.
when use selector sensorless home, when it home and hit the end, always or very high chance has a TIME TOO CLSOE red error.
check manual_stepper selector_stepper in hardware config file, change microsteps to 8 from 16. or, use a spacer on each of the M8 rod for selector rail, to adjust when it hits the wall. The timer error seems to be caused by the hit wall timing and endstop switch trigger time. I did not have the time too close error before I added two spacers(1mm) in the end of the M8 rod, but after add (to make a solid wall), there is such error. and the thickness is also important, when I use 0.8mm, no error, 1mm has error, so I have to use step=8 to get rid of the error. I guess micro step=8 should be good enough for the selector motor accuracy...
CAN id cannot query, always has zero CAN device returned
python3 ~/klipper/scripts/canbus_query.py can0 or python3 ~/klipper/lib/canboot/flash_can.py -i can0 -q
Solution: If everything is working well already, nothing is need to be fixed. Unfortunately, when everything is working correctly, CAN ID cannot query or show! (true to klipper mother board, toolhead, ercf board) My understanding is, when the device has only CANBOOT flashed, it can show CANID. after we config the CANID in the printer config file and they are all working well, CANID won't shown again. If it's not working, flash CANBOOT correctly with the right speed(using USB cable + Pi)
python3  ~/klipper/scripts/canbus_query.py can0
Total 0 uuids found
SocketcanBus was not properly shut down
Other reference
Mellow TMC2209 https://mellow.klipper.cn/?spm=a2g0o.detail.1000023.3.13e16cccOvvDGr#/board/fly_tmc/2209?id=tmc2209
Mellow Toolhead Canbus https://mellow.klipper.cn/?spm=a2g0o.detail.1000023.3.13e16cccOvvDGr#/board/fly_sb2040/README
Mellow ERCF Canbus board https://mellow.klipper.cn/?spm=a2g0o.detail.1000023.3.13e16cccOvvDGr#/board/fly_ercf/README
happyhare ERCF software https://github.com/moggieuk/ERCF-Software-V3
Mellow CanBoot https://mellow.klipper.cn/?spm=a2g0o.detail.1000023.3.13e16cccOvvDGr#/advanced/canboot
how-to-use-can-toolhead-boards-connected-directly-to-octopus-octopus-pro-on-canboot https://www.teamfdm.com/forums/topic/672-how-to-use-can-toolhead-boards-connected-directly-to-octopus-octopus-pro-on-canboot/
voron_canbus_octopus_sb2040 https://github.com/akhamar/voron_canbus_octopus_sb2040

Comments
Post a Comment